In parallel with task
force Micheal's attack Galmanche, task force Paul attacked La Bijude.
The attack started at 04.30. The East Riding Yeomanry had two
platoons of tanks in support each with two shermans and one firefly.
Opposing task force Paul was Kampfgruppe Micha consisting of D
Kompanie, 31st Luftwaffe Jaegerregiment with a large
number of supporting units including some dreaded 88's.
Note: Game wise
luftwaffe units a very cheap, balancing the sides meant the luftwaffe
got a lot of support.
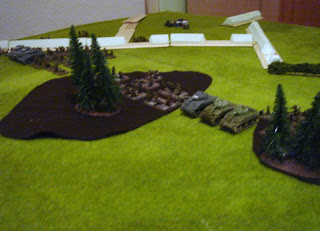
Battlefield viewed from the West
The Forces
Taskforce Paul
|
Kampfgruppe Micha
|
||
A company 7th
Royal Norfolks regiment
Company HQ
1st platoon with 3
section
2nd platoon with 3
section
3rd platoon with 3
section
Support units
Mortar platoon, S
company with 3 section
1st
Squadron East Riding Yeomanry 1 ERY
(tank platoon)
B company 7th
Royal Norfolks regiment
Company HQ
4th platoon with 3
section
5th platoon with 3
section
6th platoon with 3
section
Support units
Pioneer platoon
with 3 section
2nd
Squadron East Riding Yeomanry 2 ERY
(tank platoon)
|
D Kompanie 31st
Luftwaffe Jaegerregiment
Kompanie HQ with
Anti Tank section
7th
platoon with 3 section
8th
platoon with 3 section
9th
platoon with 3 section
Support units
Luftwaffe MG
platoon with 2 sections
Luftwaffe MG
platoon with 2 sections
Luftwaffe Mortar
platoon with 2 sections
Luftwaffe Pioneer
platoon with 3 sections
Luftwaffe Anti
tank platoon with 3 Pak7.5
Luftwaffe Anti
Air battery with 2 88s
Luftwaffe scout
platoon with 2 sections
SS panzergrenadier
platoon with 3 section
Fortifications
3 HMG nests
2 minefeilds
|
The
Battle
Note:
Based on the last campaign game we increased the playing area to
allow the British a better chance to outflank. The down side was
this created a fairly open battlefield as opposed to the dense
Normandy terrain.
Machine gun nest
The German objective went to the far end of the eastern, German side,
of the battlefield while the British objective was deployed far
forward towards the centre of the battlefield. The initial German
defence consisted of the pioneers, mortars and 1st
grenadier platoon deployed. The mortars went to the rear, The
Pioneers covered the British objective with support from the CiC and
the anti tank section. While the 1st Grenadier platoon
with the 2iC covered the German objective. The machine-gun nests and
the minefields were deployed right at the front. In addition, the
88's and a machine-gun platoon. The machine-guns from the second
platoon were attached to the grenadier and pioneer platoons.
Luftwaffe Pioneers line the road in defense of La Bijude
In response the British deploy two platoons from A company and one
platoon from B company with mortar support to along the Northern
route. The rest of the task force deployed on the Southern route
hoping to exploit a line of terrain that led to the British
objective.
British assault group North
British assault group South
The British attack started well, the ERY platoons quickly destroyed
two HMG nests while the infantry pushed on through cover. To
counter the German 88's sprung their ambush sooner than planned and
destroyed 1st squadron ERY. The remaining German units
opted to dig in. The mortar spotter tried and failed to spot any
British units in the dark. The presence of the 88's stalled the
advance northern British attack. For several turn both side traded
fire. Or more accurately the British fired on the 88's while the 88's
failed to spot any British (rolling one's to spot every time).
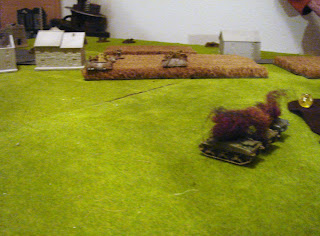
88's see a tank platoon
88's roll to see the other platoon
The stale mate was broken by 1st platoon A company which
assaulted and destroyed the guns before moving into the northern part
of La Bijude. The German mortar spotter caught a glimpse of the
Firefly from 2 ERY. The mortar strike forced the crew to bail out,
being reluctant they stayed out of the tank for the rest of the game.
The lead platoons from B company were also hit and pinned, leaving
1st platoon to go it alone. The pioneers tried to out
flank the village to give support but ran into a machine-gun nest,
lost half their number and were pinned.
The SS grenadiers arrived in half tracks and moved towards the
southern British attack intent on breaking A company. In La Bijude,
1st platoon overran the mortar spotter who could not get
away fast enough. They then were attacked by the pioneers. The two
units fought for several turns with key buildings changing hands
several times before the pioneers finally destroyed the platoon. This
was to be the furtherest the brutish could advance.
German reinforcement began to pour in. The machine-gun platoon
ambushed the southern British attack inflicting heavy casualties as
the platoons attempted to dismantle the minefields. To make it worst
the newly arrived SS grenadier platoon drove through the gapped
minefield and assaulted the three platoons of British infantry. With
ruthless efficient the grenadiers cut down the men of A company
wiping out three platoons in the process destroying the company. On
the Northern flank the Luftwaffe grenadiers broke cover and wiped out
the remaining of the pioneers. B company was still largely intact
but day break showed a mass of Luftwaffe unit converging on their
position so they opted to withdraw but not before destroying two
machince guns from the ambushing German platoon. The attack was
called of at 07.00.
SS grenadiers attack North group
The Aftermath
Taskforce Paul
|
Kampfgruppe Micha
|
||
A company 7th
Royal Norfolks regiment
Company HQ
-destroyed
1st platoon
-destroyed
2nd platoon
-destroyed
3rd platoon
-destroyed
Support units
Mortar platoon, S
company -destroyed
1st
Squadron East Riding Yeomanry
(tank platoon)
-destroyed
B company 7th
Royal Norfolks regiment
Company HQ
4th platoon 6
teams lost
5th platoon
6th platoon
Support units
Pioneer platoon
-destroyed
2nd
Squadron East Riding Yeomanry
(tank platoon)
|
D Kompanie 31st
Luftwaffe Jaegerregiment
Kompanie HQ with
Anti Tank section
7th
platoon
8th
platoon
9th
platoon
Support units
Luftwaffe MG
platoon
Luftwaffe MG
platoon
Luftwaffe Mortar
platoon -spotter lost
Luftwaffe Pioneer
platoon -3 teams lost
Luftwaffe Anti
tank platoon
Luftwaffe Anti
Air battery -destroyed
Luftwaffe scout
platoon
SS panzergrenadier
platoon
Fortifications
3 HMG nests – 2
destroyed
2 minefeilds -1
destroyed
|
The
failed attack leaves the British in spot. Task Force Paul has been
disbanded The 1st Squadron East Riding Yeomanry was
destroyed, and A Company completely wiped out. B company lost its
pioneers. B company and the 2nd Squadron have gone back
into the British reserve pool. Campaign-wise it means the British
second phase attacks will go ahead but will take fire from the
Germans holding the forward villages.
The
Germans again got away lightly with one platoon lost, the 88's and
two platoons with moderate damaged (the machine-gun and pioneers
platoons). The Germans failed to repair the destroyed British tanks
(forgot to roll for them, again). They continue to hold the line but
keep losing anti tank assets.


No comments:
Post a Comment